
When you get a dental implant, healing does not just happen at the gum line. Your body starts a detailed repair process right away, and most of the real work takes place beneath the surface where you cannot see it.
Dental implant healing stages describe how your gums close, your bone bonds to the implant, and your mouth builds a stable base for a long‑lasting extraction and replacement.
In the first days, your body forms a clot and reduces swelling.
Over the next few months, your jawbone grows around the implant in a process called osseointegration, which helps lock it in place.
Understanding the dental implant healing stages helps you protect your results and avoid problems. When you know what feels normal and what does not, you can heal with more confidence and support long-term success.
Key Takeaways
- Dental implant healing stages include gum recovery and bone bonding beneath the surface.
- Osseointegration helps secure the implant firmly in your jaw over several months.
- Proper care during healing supports long-term stability and function.
The Key Phases of Dental Implant Healing
Your dental implant healing moves through clear stages. Each step supports strong bone integration, healthy gums, and a stable final crown that feels secure when you chew and speak.
Immediate Post-Surgery Healing
Right after implant surgery, your body starts repair work. A blood clot forms around the dental implant and protects the site.
During the first 0–72 hours, you may notice:
- Mild bleeding
- Swelling that peaks around day two or three
- Soreness controlled with medication
You need to protect the clot. Avoid straws, smoking, and hard foods. Eat soft foods like yogurt, eggs, and smoothies.
In the first 1–2 weeks, swelling drops and gum tissue begins to close around the implant. Many patients return to work within a few days.
Call your dentist if pain worsens after day three, or if you notice heavy bleeding or signs of infection.
Osseointegration and Bone Integration
Osseointegration is the core of implant healing. Your jawbone grows directly against the titanium surface of the dental implant.
This process usually lasts 3 to 6 months. Bone cells attach to the implant and create strong bone integration. The implant becomes stable and able to handle chewing pressure.
Most people feel normal during this stage. You can eat most foods, but avoid biting directly on the implant if your dentist advises it.
Healing speed depends on:
- Bone quality
- Your overall health
- Smoking habits
- Whether you needed a bone graft
Strong osseointegration is what makes dental implants last for many years.
Abutment and Gum Recovery
Once bone integration is complete, your dentist places the abutment. This small connector attaches to the implant and holds the final crown.
The dentist may reopen the gum with a minor procedure. You might feel mild soreness for a few days.
Your gum tissue then shapes itself around the abutment. This step creates a natural-looking gum line and protects the implant from bacteria.
Expect:
- Light swelling for a few days
- Minor tenderness
- Fast soft tissue healing
Good brushing and gentle flossing around the area support gum recovery. Your dentist may recommend special tools to keep the site clean during this part of the healing timeline.
Final Restoration and Crown Placement
When your implant healing is complete, your dentist places the final crown. This crown matches the color and shape of your natural teeth.
The process usually includes:
- Taking impressions or digital scans
- Designing the custom crown
- Securing it to the abutment
- Adjusting your bite
Your dentist checks stability with an exam and often an X-ray. The implant should feel firm and pain-free.
Once placed, the final crown allows you to chew normally. With daily brushing, flossing, and regular dental visits, your dental implant can stay stable and functional for many years.
Talk to our dental team today and get expert guidance through every stage of your implant recovery.
Immediate Post-Surgery Healing Essentials
The first few days after implant surgery focus on controlling inflammation, protecting the surgical site, and lowering the risk of infection.
Careful post-operative care helps your body move from early healing to strong bone support.
Inflammatory Response and Early Recovery
Right after surgery, your body starts an inflammatory response. Blood forms a clot around the implant, which protects the area and begins tissue repair.
During the first 24 to 48 hours, you may notice mild bleeding, swelling, and warmth near the site. These signs are normal and show that healing has started.
Your oral surgeon will give clear aftercare instructions. Follow them closely. Rest, keep your head slightly raised, and avoid touching the area with your tongue or fingers.
Good immediate post-surgery care also includes careful oral hygiene practices. Use a soft toothbrush or soft-bristled toothbrush and avoid direct pressure on the implant site.
Many providers suggest a prescribed antimicrobial mouthwash to reduce bacteria. After the first day, you may also use a gentle salt water rinse to keep the area clean without irritation.
Pain and Swelling Management

You can expect the most swelling within the first two to three days. It often peaks around 48 to 72 hours, then slowly improves.
Use a cold pack on the outside of your cheek for 15 minutes at a time during the first day. This step helps limit swelling and supports pain management.
Take prescribed or recommended pain medicine exactly as directed. Do not skip doses in the first day if your provider advises regular timing.
Stick to soft foods like yogurt, eggs, and soup. Avoid hot, spicy, crunchy, or sticky foods that can disturb the implant site.
Drink plenty of water. Do not use a straw, since suction can disrupt the clot and delay healing.
Warning Signs and Complications
Most people heal without problems, but you need to watch for warning signs. Call your oral surgeon if you have heavy bleeding that does not slow after applying pressure.
Severe pain that worsens after several days is not typical. Fever, pus, or a bad taste in your mouth can point to infection.
Ongoing swelling that increases instead of improves may signal a problem. Early treatment can prevent peri-implantitis, a condition that affects the tissue and bone around the implant.
Implant failure is rare, but it can happen if the implant does not bond with the bone. Signs may include unusual movement or ongoing discomfort.
Report concerns quickly. Fast action protects your healing and supports long-term implant success.
Contact us now to understand your healing timeline and ensure long-term implant success.
Osseointegration: Bone Healing Beneath the Surface
After your implant is placed, your jawbone starts a precise repair process. Bone cells attach to the titanium surface, rebuild lost bone, and reshape the area so the implant can handle daily chewing.
How the Jawbone Bonds to the Implant
Osseointegration means your living bone connects directly to the titanium implant. This bond creates the stable base your future crown needs.
Right after surgery, blood fills the tiny space around the implant. Proteins stick to the titanium surface within seconds. Then special bone cells called osteoblasts move in.
Osteoblasts lay down new bone along the implant surface. This early bone is soft and woven in structure. Over the next weeks, your body replaces it with stronger, organized bone through bone remodeling.
Research on the cellular and molecular physiology of osseointegration shows that bone forms directly on the implant when movement stays minimal.
That is why your dentist checks implant stability and may limit pressure during early healing.
This bonding phase usually takes 3 to 6 months, depending on your health and bone quality.
Bone Grafting and Healing Extensions
If your jawbone is too thin or soft, your dentist may recommend a bone graft before or during implant placement.
Bone grafting adds material that supports new bone growth. The graft can come from your own body, a donor, or a synthetic material. Your body treats it like a scaffold.
Over time, osteoblasts replace the graft with your own bone. This process strengthens the site so it can support the implant long term.
Healing takes longer when you need grafting. While a standard implant may heal in a few months, grafted sites often require extra healing time before full loading.
Your dentist will use exams and imaging to confirm that enough solid bone has formed before moving to the next step.
Factors Influencing Successful Integration
Several factors affect how well osseointegration works in your case.
Key influences include:
- Bone density and volume
- Implant stability at placement
- Smoking or uncontrolled diabetes
- Good oral hygiene
- Adequate calcium and vitamin D levels
Calcium gives your body the raw material to build bone. Vitamin D helps you absorb calcium. Without both, bone healing slows.
Your dentist also chooses implant design and surface features that support faster bone attachment. Threaded implants increase surface area, which helps with stability during early healing.
Daily habits matter. Avoiding heavy chewing on the implant, keeping the area clean, and attending follow-up visits all protect the delicate bond forming between your bone and the titanium surface.
Soft Tissue and Gum Recovery
After your implant bonds with the bone, your gums begin a new phase of healing. This stage shapes how your final tooth will look and feel, and it depends on careful soft tissue recovery and steady follow-up care.
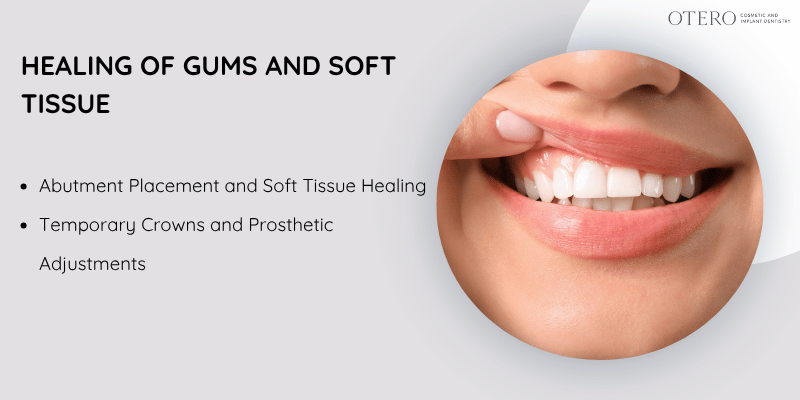
Abutment Placement and Soft Tissue Healing
Your dentist places the abutment after the implant fuses with your jawbone. This small connector sits above the implant and supports the future crown.
During abutment placement, your dentist may reopen the gum with a small incision. The goal is to guide proper gum healing around the abutment so the tissue forms a tight seal.
In the first few days, you may notice mild swelling and tenderness. That is part of normal soft tissue healing. The gum tissue will look slightly red at first, then shift to a healthy pink as it recovers.
Healthy soft tissue should:
- Fit snugly around the abutment
- Show less swelling each day
- Avoid bleeding after the first few days
Careful and professional teeth cleaning matters.
Temporary Crowns and Prosthetic Adjustments
Your dentist may place a dental crown or other temporary prosthetics once the abutment is secure. This step protects the implant and helps shape the gum line.
A temporary crown does not handle full biting force. You should avoid hard or sticky foods on that side. Too much pressure can slow soft tissue recovery and irritate the gum.
Your gums will adapt around the temporary crown over several weeks. The tissue gradually forms natural contours that support a stable, natural-looking result.
You may return for small adjustments. These visits allow your dentist to check healing and refine the fit.
If you notice increased pain, swelling, or movement of the temporary crown, contact your dentist right away. Early care protects both the implant and your gum health.
Final Restoration and Lifelong Implant Success
Once your implant fully bonds with your jawbone, your dentist moves forward with the final restoration. This step places the visible tooth and tests how well it handles daily use.
Placing the Final Crown or Prosthesis
Your dentist checks that the implant feels stable and pain free before moving ahead with final crown placement.
They may take digital scans or impressions to design a custom dental crown that matches your natural teeth in shape and color.
A lab creates the crown or prosthesis to fit your bite. If you need full-arch tooth replacement, your prosthodontist may place a bridge or an All-on-4 restoration instead of a single crown.
At your appointment, your dentist attaches the final restoration to an abutment on top of the implant. They secure it with a small screw or dental cement. You leave with a tooth that looks natural and stays firmly in place.
Restoration Phase and Functional Testing
During the restoration phase, your dentist checks how your new tooth functions. They examine your bite while you chew and speak.
You may bite on thin paper strips to mark pressure points. Your dentist adjusts the crown so it does not hit too hard or too soon. Even small changes protect the implant and nearby teeth.
Functional testing also includes checking gum health and cleaning access. Your dentist makes sure you can floss or use special tools around the implant.
This careful testing lowers the risk of overload, screw loosening, or crown damage. It helps your tooth replacement feel stable and comfortable from day one.
Maximizing Implant Longevity
You play a key role in implant longevity. Daily care keeps the bone and gums around the implant healthy.
Follow these steps:
- Brush twice a day with a soft toothbrush
- Floss daily or use interdental brushes
- Avoid smoking, which slows healing and harms bone
- Visit your dentist every 6 months for exams and cleanings
Your dentist may take X-rays from time to time to monitor bone levels. Early signs of gum inflammation or bone loss can often be treated before they cause implant failure.
With steady care and regular checkups, your implant can support chewing and speaking for many years.
Post-Implant Care and Maintenance Tips
Your daily habits shape how well your implant heals and how long it lasts. Clean it the right way, fuel your body with the right nutrients, keep your follow-up visits, and protect it from damage.
Oral Hygiene for Implants
You need steady and gentle oral hygiene practices after implant surgery. Plaque can still build up around an implant and irritate the gums.
Use a soft toothbrush twice a day. Brush along the gumline with small, light strokes. Do not scrub hard, especially in the first few weeks.
Clean between teeth once a day. Implant-specific floss slides around the post without fraying. Interdental brushes help remove debris around the abutment and under bridges.
A water flosser can also help flush out food particles. Keep the pressure on a low setting at first.
Nutritional Support for Healing

Your body needs nutrients to rebuild bone and soft tissue. Healing does not happen well without them.
Focus on soft foods during the first week. Choose eggs, yogurt, soups, soft fish, and cooked vegetables. Avoid hard, sticky, or crunchy foods that press on the implant site.
Protein supports tissue repair. Vitamin C helps your gums heal and supports collagen formation. Citrus fruits, berries, and bell peppers are simple options.
Stay hydrated. Drink water often, but avoid using straws right after implant surgery since suction can disturb the site.
Monitoring and Follow-Up Appointments
Healing under the surface takes months. You cannot see bone bonding to the implant, so exams matter.
Schedule all follow-up appointments your dentist recommends. These visits let your provider check gum health, remove sutures if needed, and confirm that the implant stays stable.
Your dentist may take X‑rays to confirm proper bone integration. They will also check your bite before placing the final crown.
Do not skip your regular cleanings after restoration. Implants still need professional care.
If you have concerns, book an implant consultation or a full dental implant consultation instead of waiting. Early action prevents small problems from turning into bigger ones.
Protecting Implants from Complications
Your implant is strong, but it is not indestructible. Daily stress and infection risks can shorten its life.
If you grind your teeth at night, tell your dentist. Teeth grinding puts heavy force on the implant and crown. A custom night guard spreads out that pressure.
Avoid using your teeth to open packages or bite ice. These habits can crack the crown or loosen screws.
Watch for warning signs:
- Swelling that lasts more than two weeks
- Bleeding when you brush near the implant
- A loose feeling in the crown
- Persistent bad taste or odor
Frequently Asked Questions
Dental implant healing happens in clear stages, from surgery to bone bonding to final crown placement. You can track progress by watching your gums, pain level, and how stable the implant feels over time.
What are the typical healing stages after getting a dental implant?
You move through four main stages after implant surgery.
First comes the surgical stage. Your dentist places the titanium post into your jawbone. You may have mild swelling and bleeding for a few days.
Next is osseointegration. During this stage, your bone grows around the implant and locks it in place.
This process can take several months and is key to long-term stability, as explained in this guide on dental implant healing stages.
After that, your gums continue to heal and strengthen around the implant.
Finally, your dentist attaches the abutment and crown in the restoration stage.
How can I tell if my dental implant is healing properly?
Healthy healing follows a steady pattern.
Swelling and soreness should slowly improve within the first week. Mild tenderness can last longer, but it should not get worse.
Your implant should feel stable. It should not shift or move when you touch it with your tongue.
There should be no pus, strong bad taste, or ongoing bleeding. If pain increases after the first few days, call your dentist.
What should my gums look like after implant surgery, and what changes are normal?
Right after surgery, your gums may look red and slightly swollen. You might also see light bruising on your cheek or gum.
Within a week or two, swelling should go down. Your gums should turn pink again and fit snugly around the implant site.
Small white patches can form as part of normal tissue healing. However, thick discharge or spreading redness is not normal and needs a dental visit.
How painful is dental implant recovery, and when does the soreness usually improve?
Most people describe the pain as mild to moderate.
You may feel the most discomfort during the first 48 to 72 hours. Over-the-counter or prescribed pain medicine usually controls it well. Swelling and soreness often improve steadily after the first few days.
By the end of the first week, many people feel much better. Some tenderness can last longer, especially if you had bone grafting.
What does recovery feel like after the second-stage (abutment) dental implant procedure?
The second-stage procedure is usually much easier than the first surgery.
Your dentist reopens the gum to place the abutment. This step is less invasive and often causes mild soreness for a few days.
You may notice slight swelling or tenderness around the gum line. Most people return to normal activity within a day or two.
Why do some dentists recommend avoiding dairy products after dental implant surgery?
Some dentists suggest avoiding dairy for the first day or two.
Dairy products can upset your stomach if you take certain antibiotics or pain medicines. Nausea can increase pressure in your mouth and affect comfort.
Milk-based drinks can also leave a film in your mouth. If you do consume dairy, rinse gently and follow your dentist’s cleaning instructions to protect the surgical site.